Editor’s Note
This excerpt details the initial steps in fabricating a dental prosthesis, from model articulation to splint creation. The process emphasizes precision through specialized tools and materials.
First, the plaster models are fixed in an average-value articulator using a construction bite (Fig. 5). The equator is determined on the model using a parallelometer. Subsequently, undercut areas are blocked out. Blocking out using adhesive wax or light-curing Triad Gel (Dentsply Sirona) is recommended. An insulating foil (e.g., ISOFOLAN, SCHEU-DENTAL) – plaster against plastic – is deep-drawn on both models (Fig. 6). Afterwards, a hard second splint is deep-drawn (Fig. 7). The splint material must allow for polymerization of plastic. A splint material thickness of 2 mm is recommended, with a minimum of 1.5 mm. The splints are first roughly trimmed without lifting them from the model.
Dr. Enrico Pasin, an orthodontist from Bad Reichenhall, explains step by step the fabrication of the BBC SA appliance he developed.

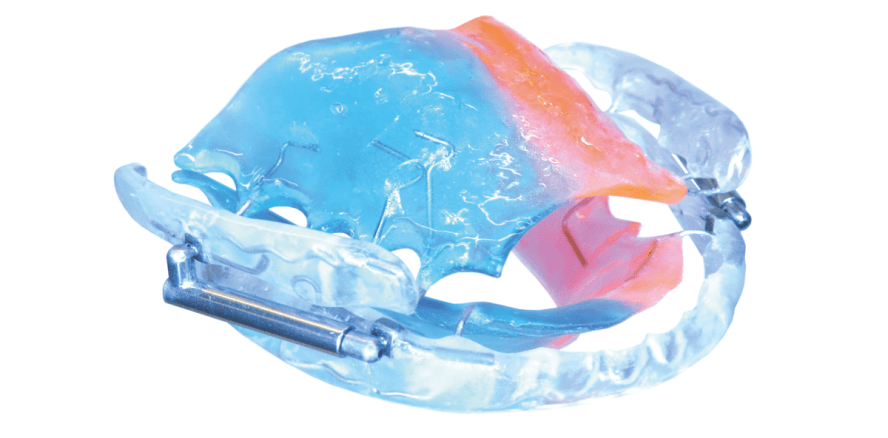
Ball joints in the upper and lower jaw allow for lateral mandibular movements, while distance sleeves enable direct adjustability of the mandible. The BBC Sleep Appliance with its individual splint design possesses all these characteristics. It draws on the proven and graceful BioBiteCorrector design with multiple telescopes from orthodontics and ensures high speech comfort without prior unlocking (Figs. 1 and 2).
As early as 2011, the BioBiteCorrector Classic (Fig. 3) was introduced in Germany as a functional orthopedic fixed appliance for correcting an Angle Class II malocclusion. The device closely follows the functional principle of a Herbst appliance. The forward positioning of the mandible into a neutral occlusion is achieved solely by adjusting the length of the telescope. Since 2014, the appliance has been distributed worldwide by Dentsply Sirona Orthodontics. Numerous articles and case demonstrations published in recent years have shown that the device has proven itself in daily clinical practice and has since won over many orthodontists.

These suggestions were incorporated into the development of the BBC SA hinge for snoring therapy, which could be presented to the professional community earlier this year. In the author’s practice, the mentioned BBC SA device version is by the way not only used to produce anti-snoring splints but also as a basis for a removable functional orthopedic appliance – the BBC-Twin (Fig. 4). Due to its optimal wearing and speech comfort, this device has now completely replaced the classic bimaxillary functional orthopedic appliances in practice.
Next, the positioning of the hinge is determined. The closed BBC SA hinge has a total length of 23 mm. The measurement is taken from the center of the lower jaw ball joint to the center of the upper jaw ball joint (20.4 mm). A sliding caliper is then used for the rough positioning of the hinges. This area must be roughened, e.g., by sandblasting. If a splint with a thickness of 2 mm is used, the same area can be thinned using a milling cutter to reduce the buccal-oral dimension. Due to the ball joints, the hinges do not need to be parallelized. Normally, the hinge is placed on the first premolar in the lower jaw and on the first molar in the upper jaw. The telescopes should be activated before installation using a distance sleeve (1.5 mm). This procedure also allows for any necessary retrusion of the mandible after completion (Fig. 8).
In the past, we aligned the hinge in the lower jaw using a “third hand” and then fixed it with a light-curing plastic. However, it has been shown that this approach has several disadvantages. On one hand, the light-curing plastic is not as stable as sprinkle-on plastic. On the other hand, working with the third hand proved to be quite time-consuming. For this reason, an auxiliary element was developed, the Body SA. Using this tool, the definitive positioning in the lower jaw is carried out.
